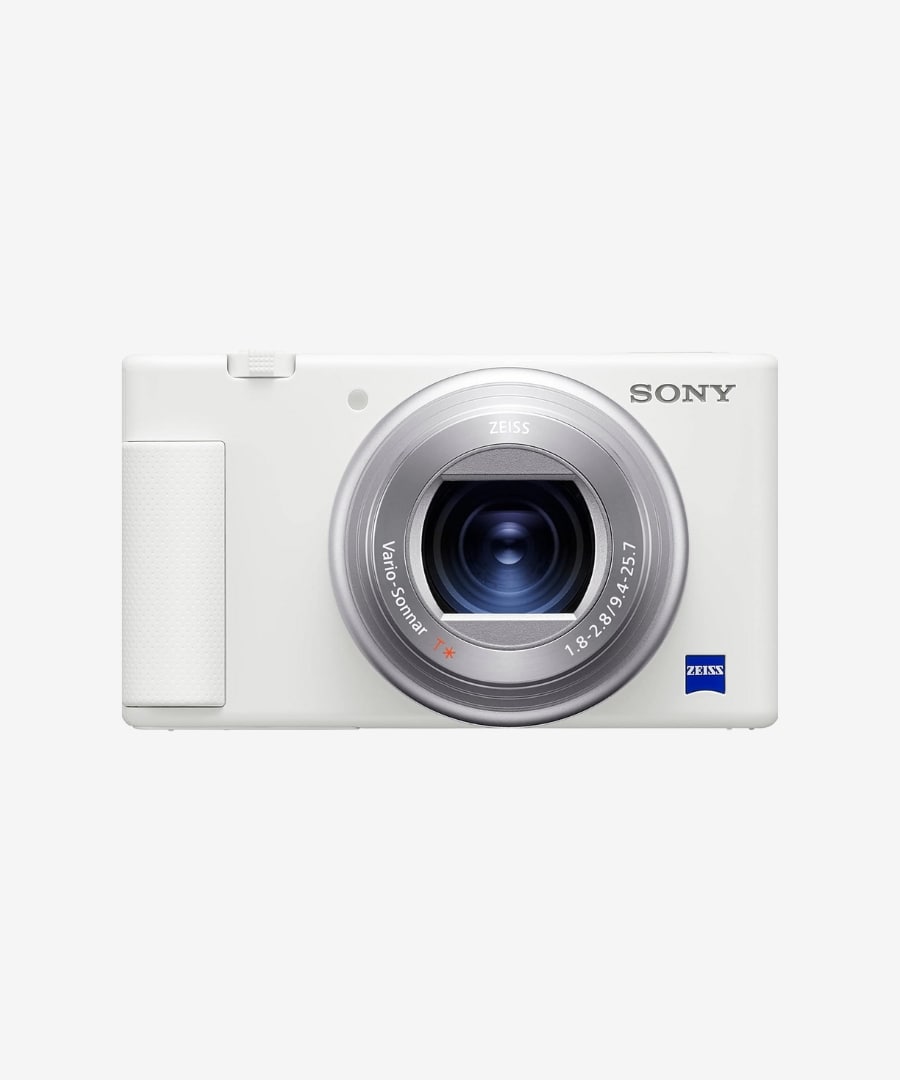
Sony ZV-1 is the most affordable best budget camera for vlogging. The BIONZ X image processor and front-end LSI, delivers impressive performance and wide-ranging sensitivity. The ZV-1 has a ZEISS Vario-Sonnar T lens with a 24-70mm equivalent range. This lens is perfect for different types of videography, from wide-angle shots to more zoomed-in compositions. Despite its compact and retractable design, the lens supports a bright f/1.8-2.8 maximum aperture range.
Technical Specs:
- 20MP – 1″ BSI-CMOS Sensor
- 4K at 30fps Video Recording
- FHD at 120fps Video Recording
- ISO 125 – 12800 ( expands to 80 – 25600)
- 24-70 mm F1.8–2.8 Zoom Lens
- Optical Image Stabilization
- 3.0″ Side Flip-Out Touchscreen LCD
- 24.0fps continuous shooting
- Real-Time Tracking & Eye AF
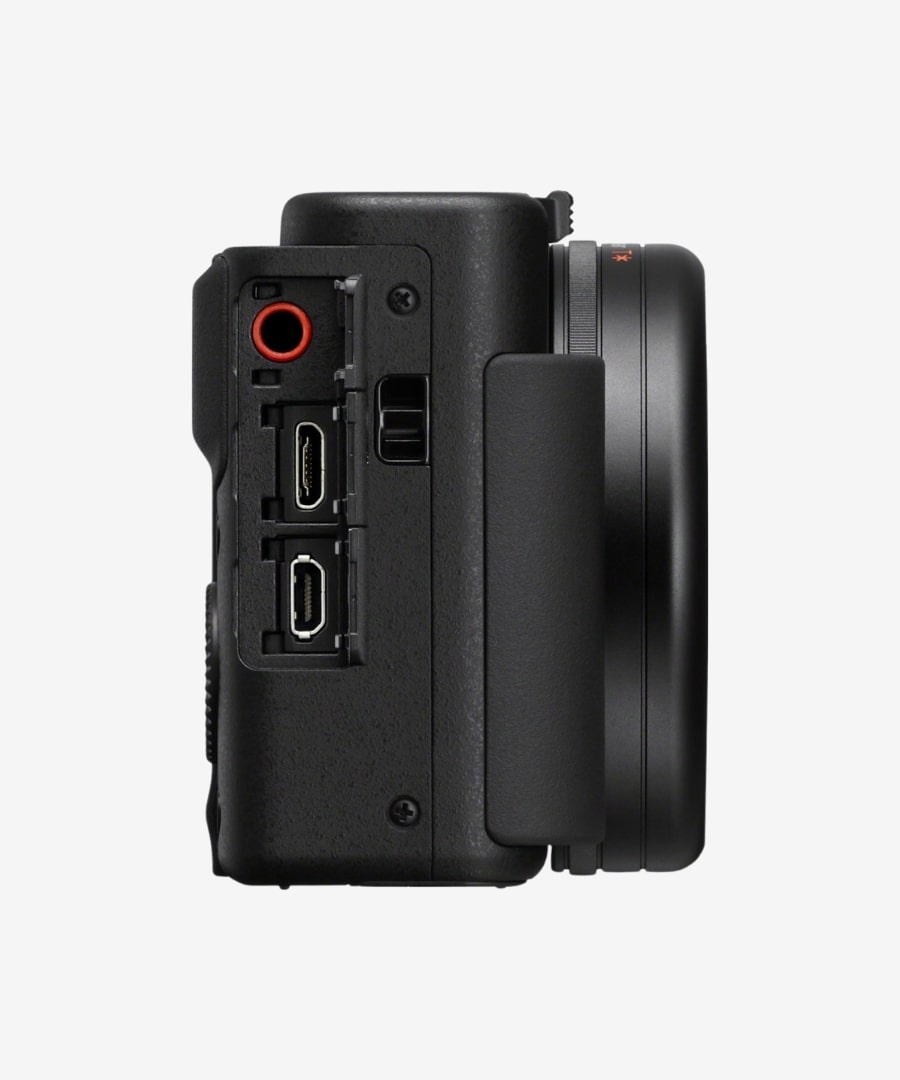
- Directional 3-Capsule Mic & Mic Jack
- BIONZ X Image Processor & Front-End LSI
- Multi-Interface Shoe
- Built-In ND Filter
- Built-in Wireless
- Weight: 294g
- Dimensions: 105 x 60 x 44 mm
4K Video Recording Quality
You can record 4K video with the Sony ZV-1 at up to 30 fps. The 4K recording comes with a slight 1.12x crop. The camera supports various recording formats, including:
- XAVC S 4K: 30p 100M (3840 x 2160/30p) / 30p 60M (3840 x 2160/30p)
- XAVC S HD: 60p 50M (1920 x 1080/60p) / 30p 50M (1920 x 1080/30p)
Use the ZV-1’s gyro metadata in post-processing:
- Record at 24p, 30p, or 60p (gyro data isn’t recorded above 120p)
- Use Active stabilization or turn it off completely
- Keep shutter speed at a minimum 1/200 to avoid ghosting effects
- Use Catalyst Browse software to analyze and stabilize footage
- Adjust crop ratio for optimal stabilization.
S-Log2/3 and HLG Picture Profiles
To enhance the creative control, the Sony ZV-1 has professional-grade picture profiles:
- S-Log2 and S-Log3: These profiles capture a more comprehensive dynamic range, giving you more flexibility in post-processing.
- HLG (Hybrid Log-Gamma): Includes HLG, HLG1, HLG2, and HLG3 options for HDR video recording.
To use these profiles, select Picture Profile presets PP7 (S-Gamut/S-Log2), PP8 (S-Gamut3.cine/S-Log3), or PP9 (S-Gamut3/S-Log3). These options allow you to capture more detail in highlights and shadows, providing a more cinematic look to your footage.

Slow Motion Mode
For slow-motion video recording, the Sony ZV-1 has :
- Standard Slow Motion: Record Full HD video at up to 120 fps.
- High Frame Rate (HFR) Mode: Capture super slow-motion footage at 240fps, 480fps, or 960fps.
To make the most of the HFR mode:
- Ensure your subject is well-lit; the shutter speed increases to 1/1000 in 960 fps mode.
- Use manual focus for more precise control.
- Set the record timing to “End Trigger” to capture action that has already occurred.
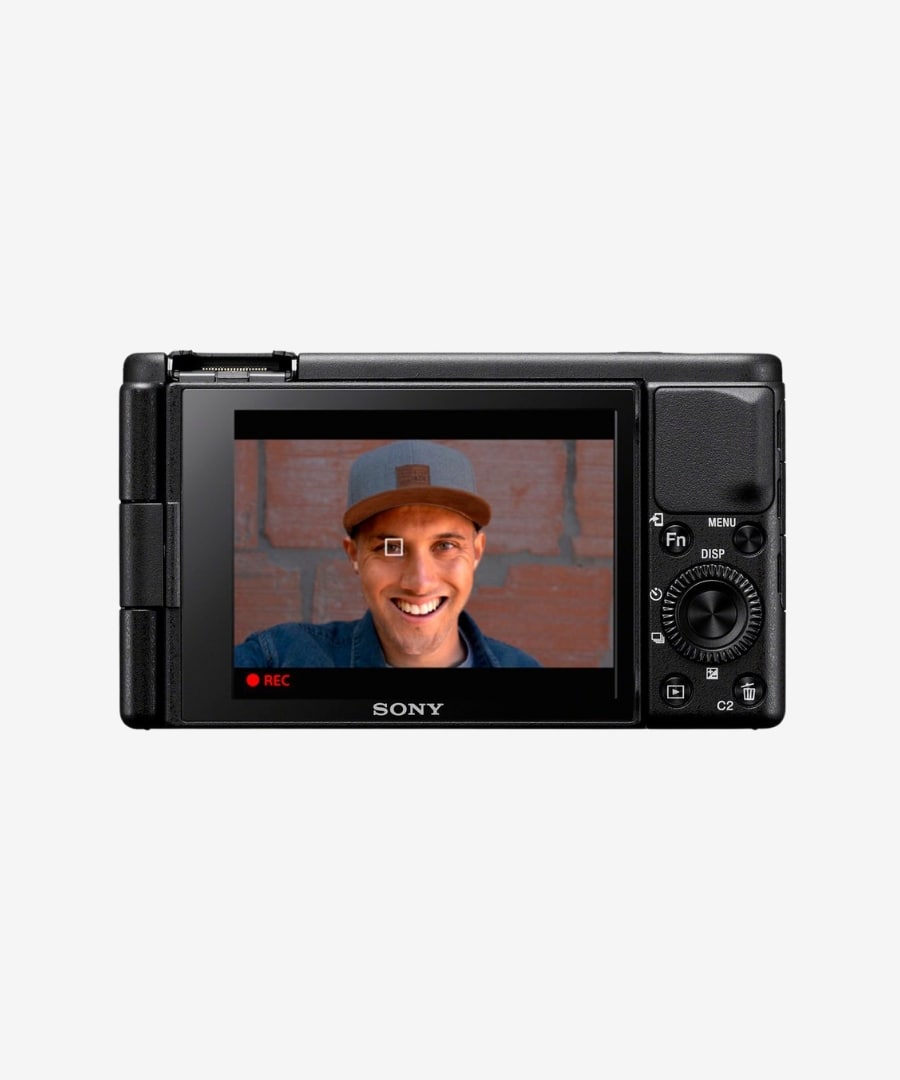
Product Showcase Setting
The product showcase feature handles a common frustration among content creators: the camera’s tendency to focus on faces rather than objects being presented to the audience.
Here’s how it works:
- Enable the Product Showcase setting through the menu or by pressing the C2 button (default assignment).
- Holding up an object to the camera automatically shifts focus from your face to the product.
- When you remove the object, the focus returns to your face.
When the Product Showcase setting is active, it seamlessly shifts the focus from your face to the product when you hold it up to the camera, eliminating the need for manual focus adjustments or awkward hand movements behind products to force focus. This feature automatically disables Face and Eye Priority in AF and SteadyShot to optimize performance, relieving you from these common frustrations.
Background Defocus Button
With a single press, you can toggle between a blurred background and a clear one, adding depth to your shots or ensuring everything is focused.
Here’s what you need to know:
- The button is located on top of the camera for easy access.
- In ‘Defocus’ mode, the aperture opens wide (typically f/1.8) to create a pleasing bokeh effect.
- In ‘Clear’ mode, the aperture stops down (to f/5.6) to keep more of the scene in focus.
Disable the Product Showcase mode when using Background Defocus. Also, consider setting your ISO to automatic to maintain proper exposure when switching between modes.
Display Quality & Features
The Sony ZV-1 features a 3-inch fully articulating touchscreen that can be flipped out to the side and rotated 180 degrees. This design ensures that the screen is always visible, even when shooting from custom angles or when accessories are mounted on the hot shoe, providing you with a sense of ease and control over your composition. The flip screen is very convenient when recording from custom angles. Whether making low-angle shots or filming overhead, you’ll always have a clear view of your composition.
Built-in Audio
The ZV-1 comes with a directional 3-capsule microphone system. It can be set to auto or manually adjust it to pick up sound from the front, back, or all around. While the auto mode works well in quiet outdoor spaces, it may struggle in noisy environments or indoors. The camera’s auto mic array doesn’t always reliably switch priority when rotating the camera 180 degrees during continuous takes.
Sony has included a wind screen accessory with the ZV-1 to combat wind noise. This windshield protects against unwanted wind interference, ensuring your audio remains crisp even in breezy conditions. It’s a compact and softer alternative to the original wind muff, attaching additional accessories like lights to your camera setup without compromising audio quality.
Compact and Lightweight Design
The ZV-1 is really portable, making it ideal for on-the-go shooting. Its compact size provides easy handling anytime and anywhere. The camera features a slight bump on the front to give comfort when holding it in a selfie position. Additionally, there’s a back thumb grip to help you maintain a secure hold. The body is constructed from solid-feeling plastic, balancing durability and lightweight design.
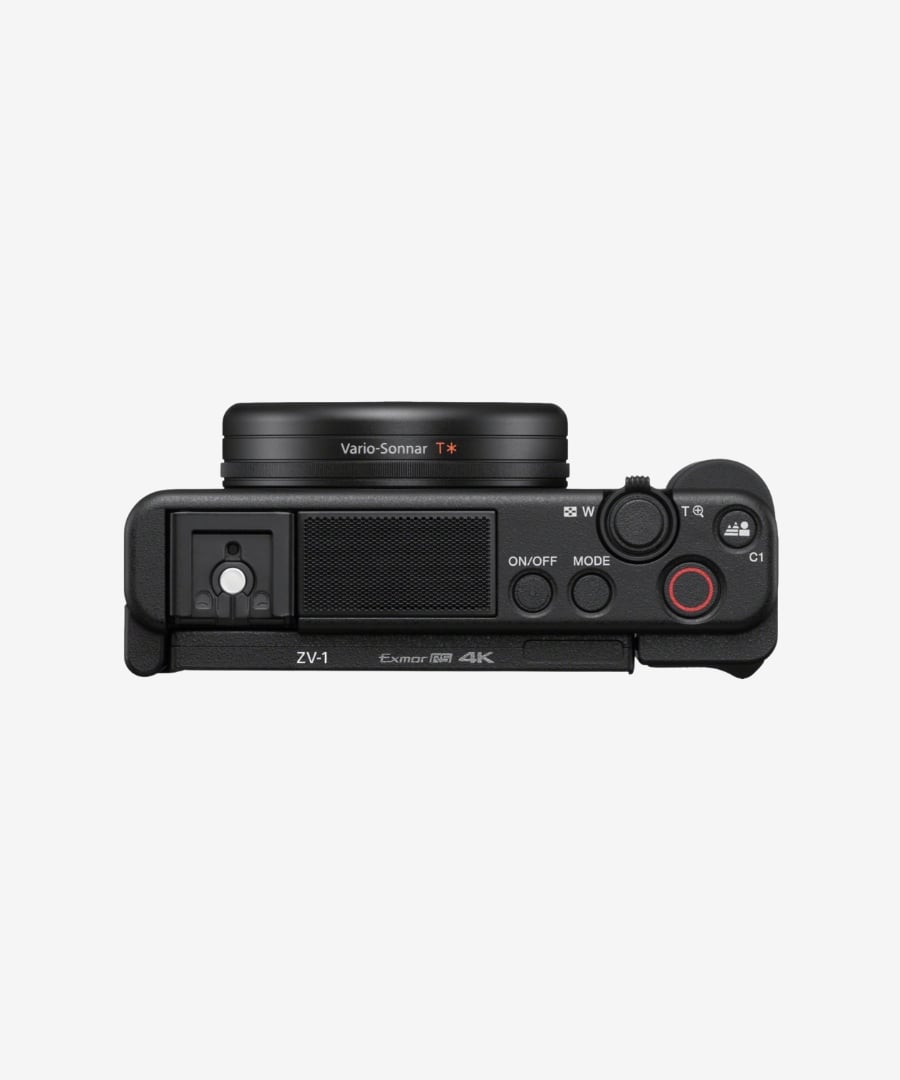
ZV-1 Handling and Controls
The ZV-1’s button layout is designed for efficiency, with most controls easily accessible. A large, dedicated video recording button is here to start filming quickly, even when in photo mode. The camera offers two custom buttons (C1 and C2) that you can program to your liking. By default, C1 controls the ‘Background Defocus’ function, while C2 toggles the ‘Product Showcase’ feature.
To customize these buttons:
- Navigate to the briefcase icon in the menu.
- Scroll to “Custom Key Dial Settings.”
- Select the button you want to customize.
- Choose from a wide range of functions to assign.
You can also customize the function (Fn) menu for quick access to frequently used settings, enhancing your workflow efficiency.
JPEG and RAW Image Quality
Choose between JPEG and RAW file formats, or even both simultaneously. The RAW format is ideal if you plan to process images professionally on a computer.
At lower ISOs (around 500), you can achieve a moody look that matches reality well. The camera’s auto ISO tends to push to 4000-6400 in low light, which can introduce noticeable noise. For the best results, try to keep ISO below 8000, as noise becomes more pronounced beyond this point.
- Keep your aperture around f/1.8 for maximum light intake.
- Set your shutter speed to avoid light flicker (typically 1/50 or 1/60).
- Adjust ISO as needed, balancing between exposure and noise.

Connectivity Options
Easily transfer images and videos to your smartphone or tablet with built-in Wi-Fi and Bluetooth capabilities. To make the most of these features, you’ll need to download Sony’s Imaging Edge Mobile app, available for both Android and iOS devices.
To connect your ZV-1 to your smartphone:
- Enable Bluetooth on your camera by going to the Network tab in the menu.
- Turn on the Bluetooth function and ensure Airplane mode is off.
- Open the Imaging Edge Mobile app on your smartphone.
- Scan the QR code displayed on your camera’s screen.
- Follow the on-screen prompts to complete the connection.
Once connected, you can transfer files, use your smartphone as a remote control, or even geotag your images.
Battery Life and Charging Features
The ZV-1 uses an NP-BX1 battery, providing approximately 260 shots per charge according to CIPA ratings. You can have 45 minutes of actual shooting time or 75 minutes of continuous recording for video recording.
Charging options include:
- Using the supplied AC adapter
- Connecting to a computer via USB
- Using a portable power bank (supports charging while in use)
To maximize battery life, consider using the ‘Auto Monitor OFF’ feature, which can extend usage to around 410 images when set to turn off after 2 seconds of inactivity.
The ZV-1 comes with a built-in power-saving feature that can significantly extend your battery life. To activate this mode:
- Go to MENU → (Setup) → [Auto Monitor OFF]
- Choose your desired setting: 2 Sec, 5 Sec, or 10 Sec
When enabled, the camera will automatically switch to power-saving mode if you don’t operate it for the selected duration.
Live Streaming
With system software version 2.00 or later, you can use your camera as a high-quality webcam for live streaming or web conferencing.
To set up live streaming:
- Set your camera to movie recording mode.
- Go to MENU → (Camera Settings2) → [USB Streaming].
- Connect your camera to your computer using a USB cable.
- Start streaming from your preferred platform.
During USB streaming, you can adjust settings like shutter speed and ISO sensitivity, and even use features like Product Showcase Set and Background Defocus.
Mobile App Integration
The Imaging Edge Mobile app serves as a powerful companion to your ZV-1. It allows you to:
- Transfer images and videos wirelessly
- Use your smartphone as a remote control
- Geotag your photos
- Perform remote shooting
To make the connection process smoother, consider enabling the “Control with Smartphone” option in your camera’s network settings. This maintains an always-on Bluetooth connection, allowing for seamless remote shooting, although it may slightly impact battery life.